Webflow: Subscription Booster
Last updated 01/25/2026
Before adding a Subscription Booster, make sure you have added the initialization script tag.
The Subscription Booster popup dialog will pop up after a specified number of seconds, prompting the user to sign in to subscribe to your newsletter, contest, or special offer. You can then use our integrations to put the user right into your mailing list, via Mailchimp, Zapier, HubSpot, etc.
Bread & Butter remembers who has signed up, and won’t prompt them again. The Subscription Booster will be hidden for 24 hours for users who dismiss it without signing in.
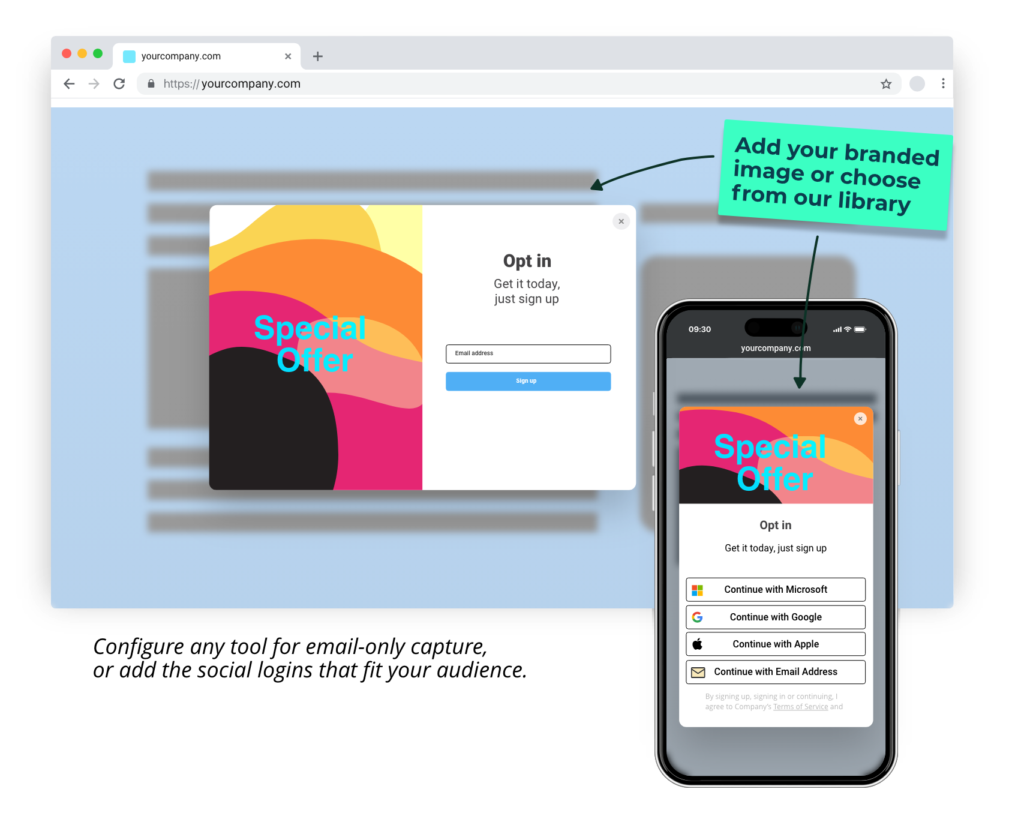
This guide explains how to add the Subscription Booster to any page on your site, and how to configure the content you want it to display, including header image.
Note: You don’t need to add the Instant Lead Capture snippet for the Subscription Booster to work. The Subscription Booster pop up will be launched on its own.
Step 1
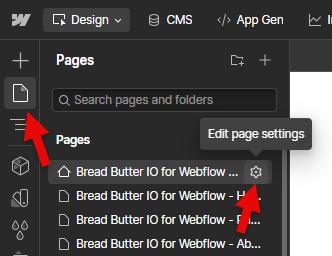
- In Designer, open Pages in the left nav.
- Hover over Home, or whichever page you want the Subscription Booster to appear on.
- Click the gear icon to open the page settings.
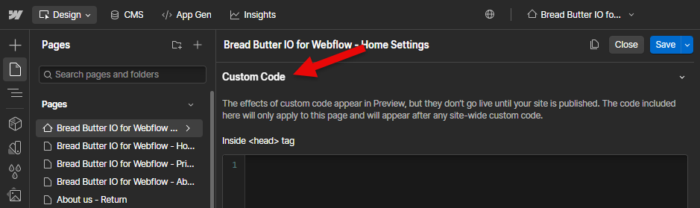
Step 2
Scroll down to the Custom Code section, for the Head tag.
Step 3
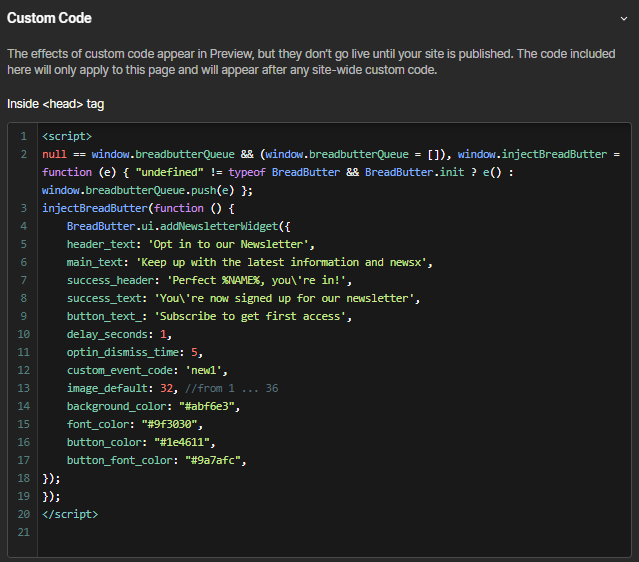
In the Head Code field, paste in the following script tag:
<script>
null == window.breadbutterQueue && (window.breadbutterQueue = []), window.injectBreadButter = function (e) { "undefined" != typeof BreadButter && BreadButter.init ? e() : window.breadbutterQueue.push(e) };
injectBreadButter(function () {
    BreadButter.ui.addNewsletterWidget({
        header_text: 'HEADER_TEXT',
        main_text: 'BODY_TEXT',
        success_header: 'SUCCESS_HEADER',
        success_text: 'SUCCESS_TEXT',
        custom_event_code: 'CUSTOM_EVENT_CODE',
        delay_seconds: 5,
        optin_dismiss_time: 1440,
        image_default: 32, //from 1 ... 36
        background_color: "#FFFFFF",
        font_color: "#000000",
        button_color: "#50aff5",
        button_font_color: "#FFFFFF",
});
});
</script>
Step 4
All of the available parameters are explained below. Feel free to configure them to meet your specific requirements, or remove them altogether to use the default text and configuration.
Step 5
Use the text fields to let your visitors know what you want them to sign up for, and the benefits they get for signing up.
- Replace HEADER_TEXT with the header text you want. This will appear at the top of the dialog.
- Replace BODY_TEXT with the main body of text that you want to appear.
- Replace SUCCESS_HEADER with the header text that you want to appear after a user successfully signs up.
- Replace SUCCESS_TEXT with the success message that you want to appear after a user successfully signs up.
Step 6
- For delay_seconds, enter the amount of time in seconds after page load that you would like the Subscription Booster to appear. Important: don't include ' ' around the time value. See above example data.
- For optin_dismiss_time, enter the amount of time in minutes that the Subscription Booster will be hidden, after a visitors dismisses it. The default value is 1440 minutes (24 hours).
Step 7
Replace CUSTOM_EVENT_CODE with the user event code that you want to trigger when a user signs up. Head to Automations, then the User Events tab to create a new custom event.
Note: A custom event code is required to complete the Subscription Booster setup.
Step 8
For the left side image, you can choose from a set of 36 default images, your own custom image, or no image.
- For image_default choose 1 through 36 to select one of our default images.
- If you want a custom image, replace this with
image_source: "URL_HERE",and enter your own image URL. Recommended size: 450 x 600 pixels. - If you don't want any image, replace this with
image_type: "none",.
Step 9
For colors, you can set the backgound color, text color, button color, and button text color for the sign in options section. You only need to adjust these if the default colors don't mesh with your existing site color palette. Enter the hex code for the colors you want.
Step 10
- Click Save Changes.
- Publish your website, when ready.
Don’t use Bread & Butter? Want to learn more about how Bread & Butter solves the four biggest problems facing marketers today? Book a demo and see how Bread & Butter is helping marketers make the most of their first-party data


Seeing changes in your match rates? With the end of third-party cookies & new regulations on how data can be shared (GDPR, CCPA or Data Protection Laws), what are you doing to make sure you aren’t caught out?
FUTURE PROOF YOUR DATA - LEARN MOREAdd authentication & API event tracking to your website/app with a script tag & configuration