Webflow Newsletter Sign up

Last updated 05/05/2023

Before adding a Newsletter tool make sure you have added the initialization script tag.
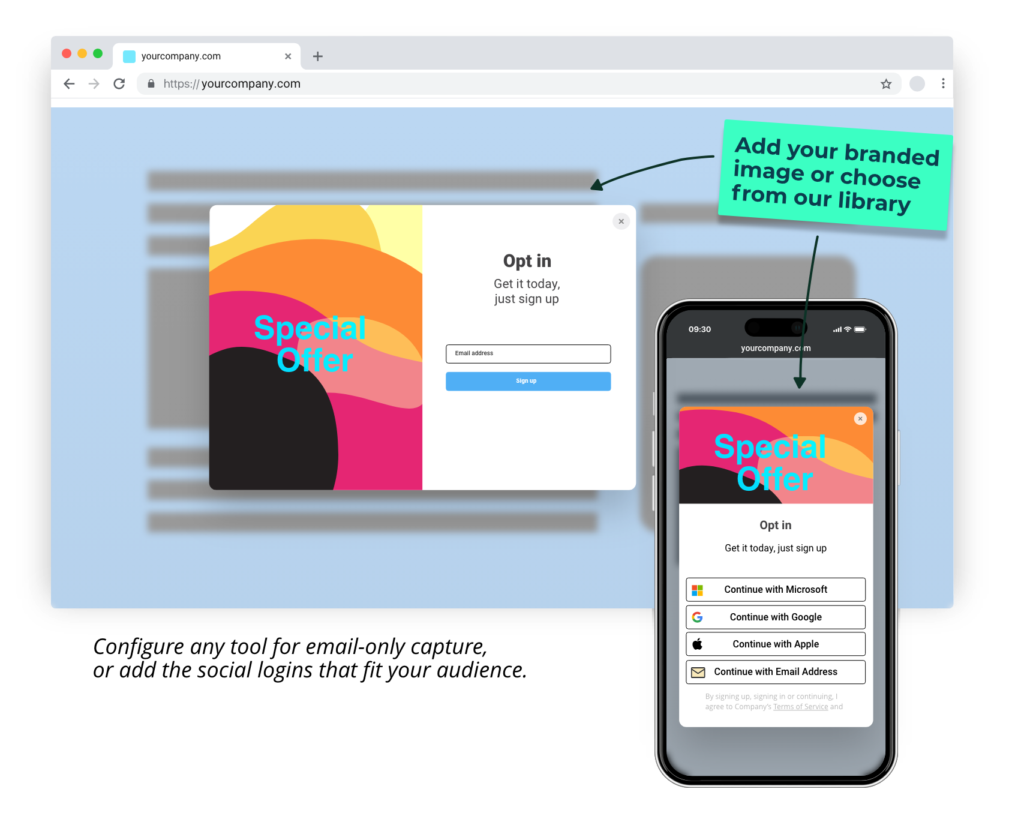
Add the Bread & Butter Newsletter Sign up to any page on your site. The Newsletter dialog will pop up after a specified number of seconds, prompting to user to authenticate with the provider of their choice to sign up for your newsletter.

Bread & Butter remembers who has signed up, and won’t prompt them again.

This guide explains how to add the Newsletter tool to any page on your site, and how to configure the content you want it to display, including background image.

Note: You don’t need to add the ‘Continue with’ snippet for the Newsletter Sign up tool to work. The ‘Continue with’ pop up will be launched on its own.

Step 1

  • In Designer, open Pages in the left nav.
  • Hover over Home, or whichever page you want the Newsletter to appear on.
  • Click the gear icon to open the page settings.
Step 1

Step 2

Scroll down to the Custom Code section, for the Head tag.

Step 2

Step 3

In the Head Code field, paste in the following script tag:

<script>
null == window.breadbutterQueue && (window.breadbutterQueue = []), window.injectBreadButter = function (e) { "undefined" != typeof BreadButter && BreadButter.init ? e() : window.breadbutterQueue.push(e) };
injectBreadButter(function () {
    BreadButter.ui.addNewsletterWidget({
    custom_event_code: 'CUSTOM_EVENT_NAME',
    delay_seconds: DELAY_TIME_SECONDS,
    header_text: 'HEADER_TEXT',
    main_text: 'BODY_TEXT',
    success_text: 'SUCCESS_TEXT',
    image_source: 'IMAGE_URL'
});
});
</script>
Step 3

Step 4

Replace CUSTOM_EVENT_NAME with the user event code that you want to trigger when a user signs up. Don't have an user event or Integration and Rule set up yet? Check out Integration Setup.


Step 5

  • Replace DELAY_TIME_SECONDS with the amount of time after page load that the Newsletter tool appears. Important: don't include ' ' around the time value. See above example data.
  • Replace HEADER_TEXT with the header text you want. This will appear at the top of the dialog.
  • Replace BODY_TEXT with the main body of text that appears for logged out users.
  • Replace SUCCESS_TEXT with the text that appears after a user successfully authenticates and signs up for the Newsletter.

Step 6

IMAGE_URL is optional. If you want to use the default image as seen in the example at the top of the page, simply remove this line.

If you want to add your own custom image, replace IMAGE_URL with the source URL of the image you want to use.


Step 7

  • Click Save Changes.
  • Publish your website, when ready.