WordPress: Instant Lead Capture
Last updated 01/14/2026
You can add the Bread & Butter Instant Lead Capture to any page on your site. The Instant Lead Capture appears on top of your page, prompting your users to authenticate with your website. It handles the entire authentication process, including registration, login, and forgot password.

Turning on the Instant Lead Capture in on some or all pages
You can turn on the Bread & Butter Instant Lead Capture for all pages from the Bread & Butter plugin settings. Simply follow these steps:
- In the left menu in WordPress Admin, click on Bread & Butter.
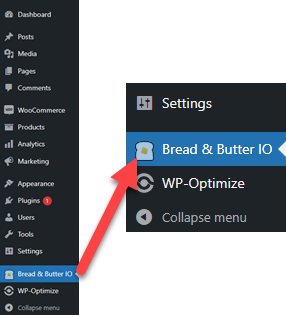
- Go to Instant Lead Capture in the left menu, and under the page selector, choose All Pages & Posts.

- Click Save.
The Instant Lead Capture will now appear on page load for all pages on your website. We recommend enabling the ‘Account Widget‘ tool as well, as it will allow users to sign out.
Turning on the Instant Lead Capture on one, or only a few pages
You can turn on the Bread & Butter Instant Lead Capture for a single page (or multiple pages or categories) from the Bread & Butter plugin in WordPress. Simply follow these steps:
- Go to Instant Lead Capture in the left menu, then select the pages you want the Instant Lead Capture to appear on.
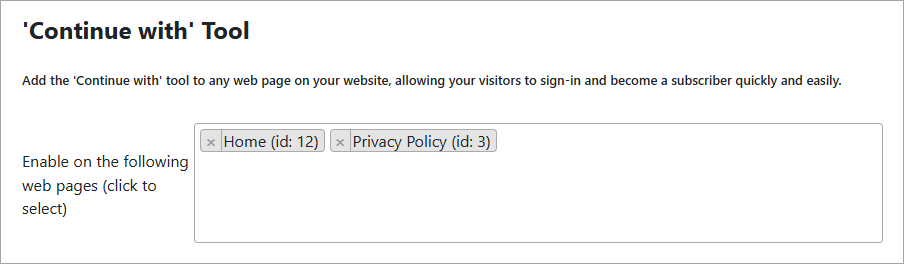
Note: You can start typing in the field and matching pages will appear. - Click Save.
More options to configure
Once you have enabled the Instant Lead Capture on your website, you can also change the following:
- Its position on the page
- Success message displayed after sign in
- How long after page load that it appears
- The header text at the top of the tool
These are configurable globally, or page-by-page.