Custom Google Identity Provider
Last updated 06/03/2025
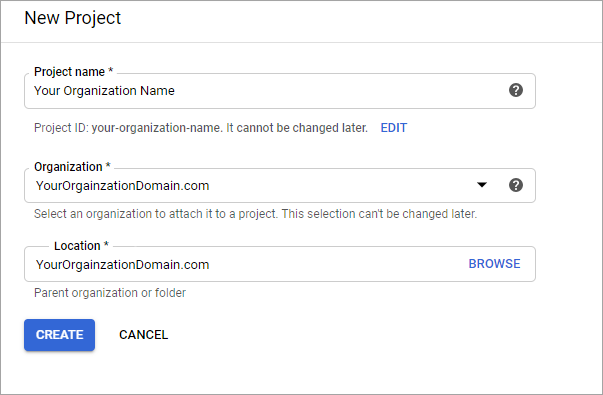
Step 2
At the top of the page, click Select a Project, then New Project.
Step 3
- For Project name, enter your organization’s name.
- For Organization, select your organization.
- For Location, select your organization.
Click Create
Step 4
At the top of the page, change your project to the one you just created. If it's your first project, it should already be selected.

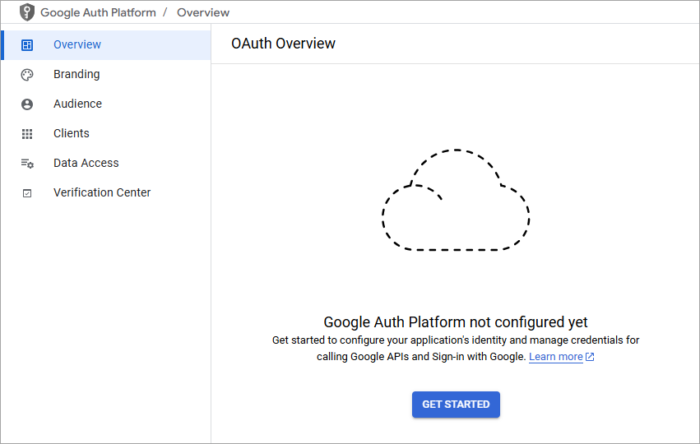
Step 5
In the left menu (or under Quick access on the page), click on APIs & Services, then OAuth consent screen.
Step 6
Click Get Started to begin the OAuth setup process.
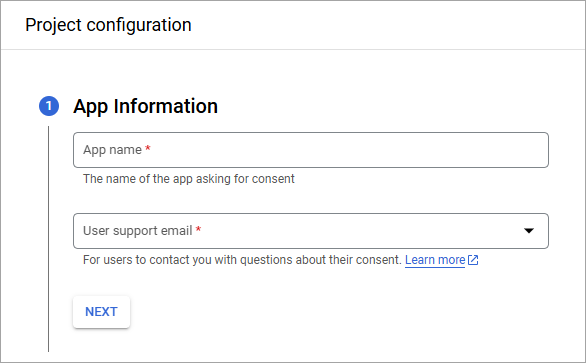
Step 7
- For Application name, enter your organization’s name.
- For Support email, enter your email address.
- Click Next.
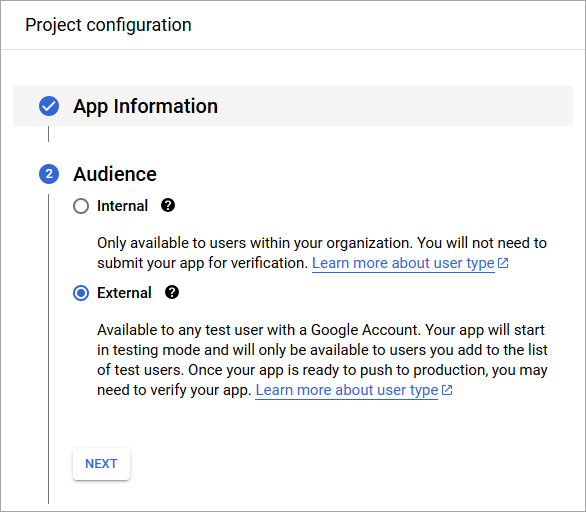
Step 8
- For Audience, choose External.
- Click Next.
Note: For the Google Social Provider, please ensure that the audience is External. This allows any Google user to authenticate and log in. Internal restricts login to your domain only.
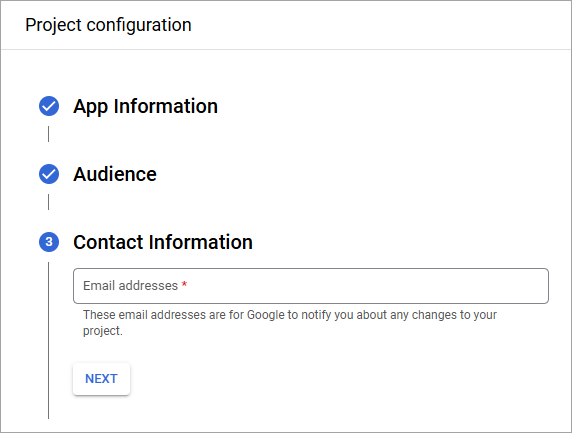
Step 9
Enter your contact email address, then click Next.
Step 10
Review and agree to Google's User Data Policy, then click Continue, then Create.
Step 11
Optional: In the left menu, go to Branding, and enter your privacy policy and terms of service links.
Note: Leave the App Logo empty. A custom App Logo will require additional App validation when publishing your App. To add your company logo, please contact Bread & Butter Support after completing the remaining steps.
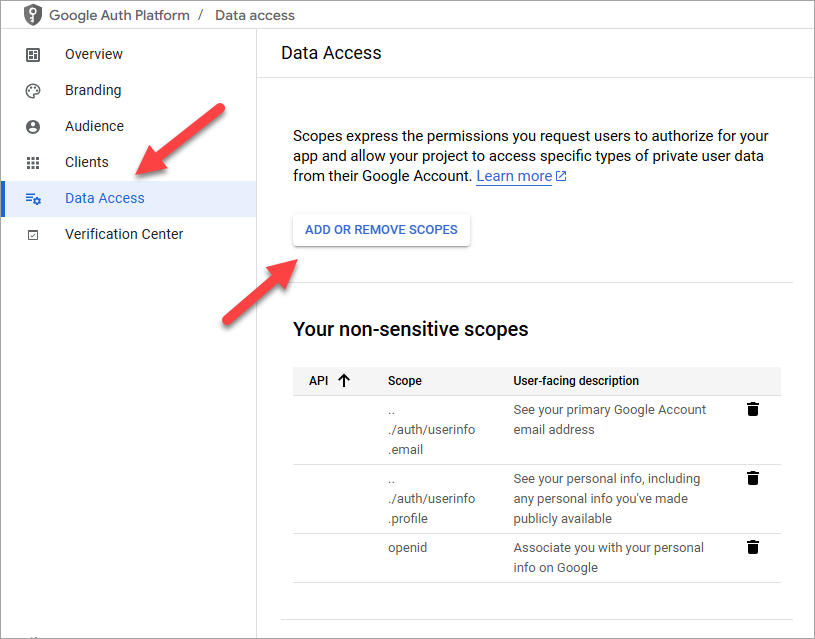
Step 12
- In the left menu, select Data Access.
- Click Add or Remove Scopes.
- Select or manually add email, profile, and openid to scopes.
- Click Update at the bottom of the side panel, then click Save on the Data Access page.
Step 13
- In the left menu, select Clients.
- Click Create Client.

Step 14
- For Application type, select Web application.
- For Name, enter your app name. We recommend entering your organization name.
- For Authorized redirect URIs, enter:
https://api.breadbutter.io/callback - Click Create.

Step 15
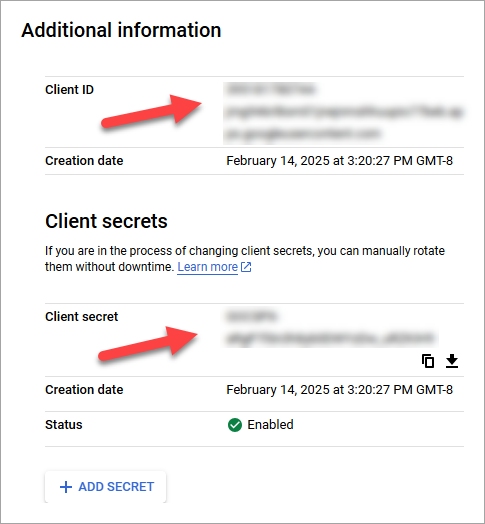
Click on the client you just created, and then copy the Client ID and Client Secret for the Bread & Butter setup below.
Step 16
Bread & Butter Setup:
- Go to https://app.breadbutter.io/sign-in/
- Click Sign In and authenticate (or Sign Up make a new account and authenticate).
- Go to Settings in the left menu.
- Click on Google under SSO Settings > Social Accounts.
- Select "Set Google for Production".
- Enter a custom name and description.
- Enter the Client ID from the Google setup steps above.
- Enter the Client Secret from the Google setup steps above.
- Click Save.
- Click the checkbox next to your new Google provider to enable it.

Step 17
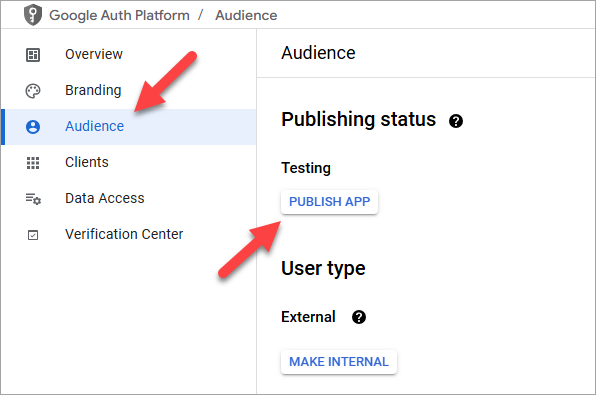
- Go back to Google.
- In the left menu, select Audience.
- Click Publish App to make your app available to any user with a Google account.
Step 18
You may still see breadbutter.io on the Google sign in window. To address this, you'll need to complete the Custom Domain Branding Setup
Don’t use Bread & Butter? Want to learn more about how Bread & Butter solves the four biggest problems facing marketers today? Book a demo and see how Bread & Butter is helping marketers make the most of their first-party data


Seeing changes in your match rates? With the end of third-party cookies & new regulations on how data can be shared (GDPR, CCPA or Data Protection Laws), what are you doing to make sure you aren’t caught out?
FUTURE PROOF YOUR DATA - LEARN MOREAdd authentication & API event tracking to your website/app with a script tag & configuration