Zapier Webhook Integration & Rules
Last updated 06/11/2025
The Zapier Webhook integration & rules allow you to connect to a Zap, using a Webhook as the Zap trigger. Bread & Butter also sends all of the user’s information, allowing you almost unlimited flexibility with your Zap. A few real world examples are:
- When a new user authenticates, send their user information to your Sales account via Gmail
- When a user visits a specific page, and their referrer is Google, add them as a lead in Salesforce
- If a user reads a specific whitepaper, and they are from the US, add or update their contact in ActiveCampaign
Please note: a Premium membership with Zapier is required for Webhooks.
Integration:
To set up your Zapier Integration, first follow these steps:
- Log in to your Zapier account.
- In the left Navigation menu, click Create, and choose Zaps.

- Click on Trigger, then search for and choose Webhooks by Zapier.
Please note: a premium/pro membership with Zapier is required.

- For Event, choose Catch Hook, then click Continue.

- Click Continue again to skip through the Trigger section.
- Copy the Your Webhook URL, and keep this page open for a later step.
To create your Zapier Integration in Bread & Butter, follow these steps:
- Log in to your Bread & Butter Dashboard at: https://app.breadbutter.io
- Click Logic on the left side menu.

- Scroll down to the Integrations section, and click Create New.

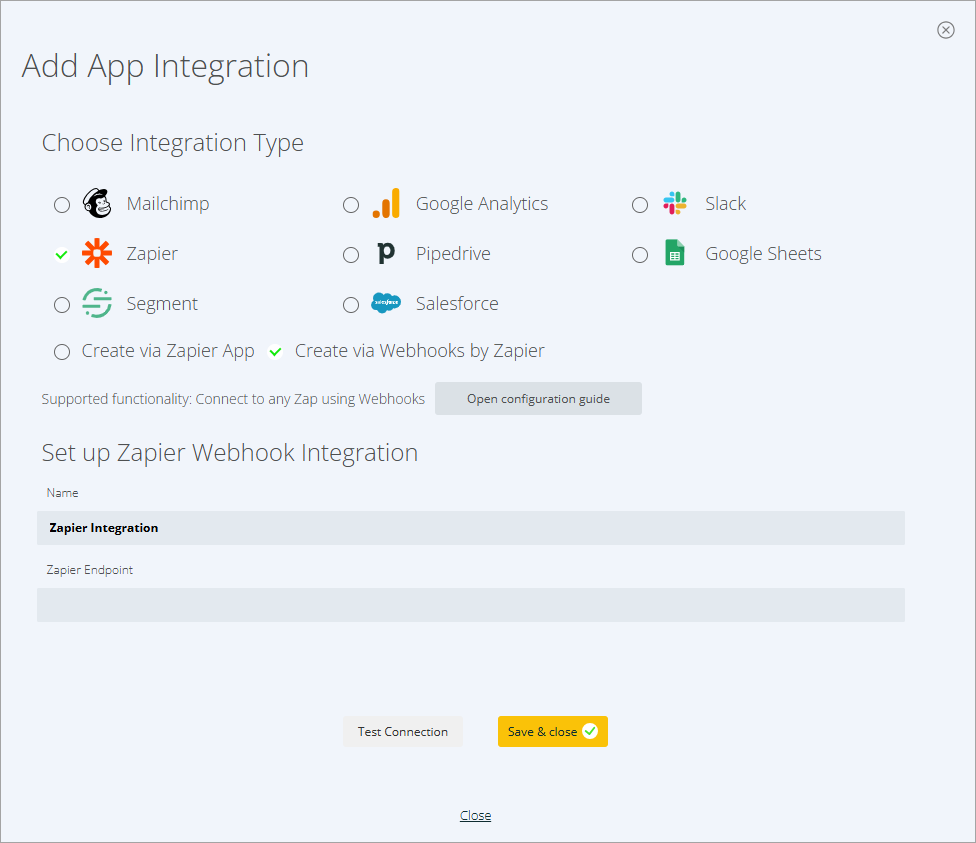
- In the dialog, select Zapier > Create via Webhooks by Zapier.
- Choose a descriptive name for the Integration (note: this can be anything, and you can change the name later).
- Enter the Custom Webhook URL from Zapier.
- Click Test Connection. If a green checkmark appears, move to the next step. If you see a red X, confirm that you have entered the correct Zapier Endpoint and then try again.
- Return to Zapier and click Test trigger.

- You should see that a request was found, including request details. If this is not the case, please repeat steps 6 and 7, and verify that you have entered the correct Webhook URL into the Bread & Butter plugin.

- Click Continue with selected record.
- Follow Zapier’s guide for setting up a Zap Action: https://zapier.com/help/create/basics/set-up-your-zap-action
- Return to your Bread & Butter Integration and click Save & close.
Please note that a Bread & Butter Zapier Webhook Integration connects directly to only one Zap, so if you want to make multiple Zaps, you’ll need to create a new Zapier Webhook Integration for each one.
Rules:
To set up a Rule that uses your Zapier Webhook integration, please follow these steps:
- Log in to your Bread & Butter Dashboard at: https://app.breadbutter.io
- Click Logic on the left side menu.
- Scroll down to the Rules section, and click Create New.

- Choose the Zapier Integration that this Rule will use.
- Then, choose the User Event or System Event that will trigger this Rule.
- Give the rule a name so you can identify it in the Rules list.

- Click Save & close.
Your rule is now set up and ready to go. Whenever a user triggers the user event via your website, the Rule will be triggered.
Don’t use Bread & Butter? Want to learn more about how Bread & Butter solves the four biggest problems facing marketers today? Book a demo and see how Bread & Butter is helping marketers make the most of their first-party data


Seeing changes in your match rates? With the end of third-party cookies & new regulations on how data can be shared (GDPR, CCPA or Data Protection Laws), what are you doing to make sure you aren’t caught out?
FUTURE PROOF YOUR DATA - LEARN MOREAdd authentication & API event tracking to your website/app with a script tag & configuration