How To Set Up Your Own Google App (SAML)
Last updated 05/29/2026
Step 2
- Click on Apps > Overview.
- On the Apps page, click on Web and mobile apps.
- Click on Add App and then Add custom SAML app.

Step 3
- For App Name, enter your organization's name.
- Enter a description and App icon if you'd like.
- Click Continue.
Step 4
- In the dialog that appears, complete Option 1 to download the IdP metadata, and keep this for the Bread & Butter setup below.
- Note: The X.509 Certificate will expire in 5 years. Set a reminder for yourself to generate a new Certificate before it expires. If the Certificate expires, your users will no longer be able to log in with the provider
- Click Continue.
Step 5
- For ACS URL, enter the following:
https://api.breadbutter.io/callback - For Entity ID, choose a unique name
- Leave Start URL blank
- For Name ID Format, choose EMAIL.
- Click Continue.

Step 6
Under Attributes, click Add Mapping and add the following entries (case sensitive):
- Add email, and choose the value Primary Email from Basic Information
- Add first_name, and choose the value First Name from Basic Information
- Add last_name, and choose the value Last Name from Basic Information
Click Finish.

Step 7
- Your app information should now be displayed. Expand the User Access section by clicking on it.
- Set Service Status to ON for everyone.
- Click Save.

Step 8
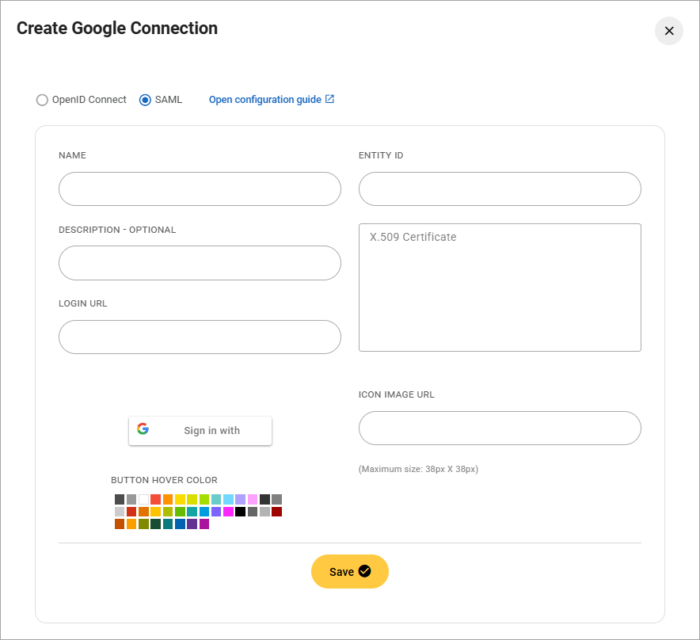
Bread & Butter Setup:
- Go to https://app.breadbutter.io/sign-in/
- Click Sign In and authenticate (or Sign Up make a new account and authenticate).
- Go to Settings in the left menu.
- Click on the Google button under Global Conversion Methods > Enterprise Connections.
- Choose SAML for the protocol.
- Enter a name.
- Enter a description (optional).
- In the Login URL field, enter the SSO URL from the downloaded "GoogleIDPMetadata" document.
- In the Entity ID field, enter the Entity ID that you set in Step 5.
- In the X.509 Certificate field, enter the X.509 certificate from the downloaded "GoogleIDPMetadata" document. Do not include -----BEGIN CERTIFICATE----- and -----END CERTIFICATE-----.
- Click Save.
- Enable Google by clicking the new entry in the Google Identity Providers list.