How to add the Opt-in Popup
Last updated 01/31/2024
Before adding the Opt-in popup (Newsletter) tool make sure you have added the initialization script tag.
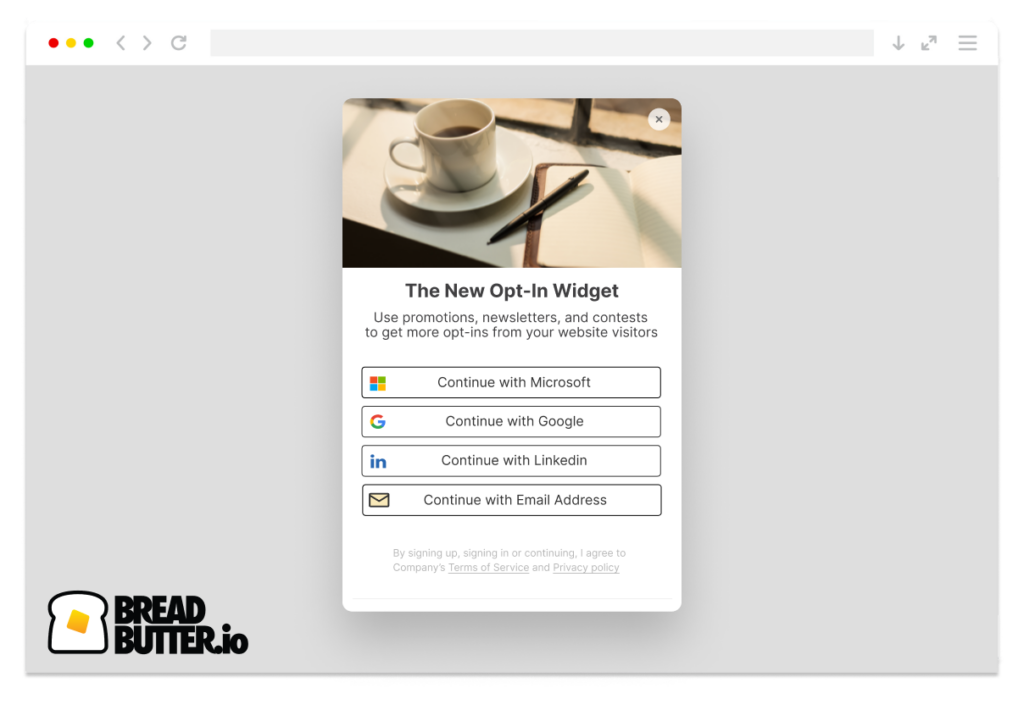
Add the Opt-in popup (Newsletter) tool to any page on your site. The Opt-in popup dialog will pop up after a specified number of seconds, prompting the user to authenticate with the provider of their choice to sign up.
Bread & Butter remembers who has signed up, and won’t prompt them again.

This guide explains how to add the Opt-in popup tool to any page on your site, and how to configure the content you want it to display, including header image.
Step 1
Find the initialization script you have added to your webpage (see initialization script if you have not added it already)
Step 2
In the initialization script, find the line:
BreadButter.configure({app_id: "[APP_ID]"});
Step 3
Add the following line under BreadButter.configure();
BreadButter.ui.addNewsletterWidget({
    custom_event_code: 'CUSTOM_EVENT_NAME',
    delay_seconds: DELAY_TIME_SECONDS,
    header_text: 'HEADER_TEXT',
    main_text: 'BODY_TEXT',
    success_header: 'SUCCESS_HEADER',
    success_text: 'SUCCESS_TEXT',
    image_type: 'IMAGE_TYPE',
    image_source: 'IMAGE_URL'
    });

Step 4
Replace CUSTOM_EVENT_NAME with the user event code that you want to trigger when a user signs up. Don't have a user event or Integration and Rule set up yet? Check out Integration Setup.
Step 5
- Replace DELAY_TIME_SECONDS with the amount of time after page load that you would like the Opt-in popup tool to appear. Important: don't include ' ' around the time value. See above example data.
- Replace HEADER_TEXT with the header text you want. This will appear at the top of the dialog.
- Replace BODY_TEXT with the main body of text that you want to appear for logged out users.
- Replace SUCCESS_HEADER with the header text that you want to appear after a user successfully authenticates and signs up.
- Replace SUCCESS_TEXT with the success message that you want to appear after a user successfully authenticates and signs up.
Step 6
For the header image, you can choose the default image, your own custom image, or no image.
- For IMAGE_TYPE there are four options:
- default - Uses the default image (default if not specified).
- fill - crops and resizes your custom image to fit the entire space in the header.
- center - Crops and resizes your custom image to fit a 200x100px space in the header.
- none - No image in the header.
- IMAGE_URL is optional. If you want to add your own custom image, replace IMAGE_URL with the source URL of the image you want to use. Choose 'fill' or 'center' for the image type, depending on how you want it to look.
Step 7
You should now see the Opt-in popup tool appear on the specified page, after the specified time period.
Don’t use Bread & Butter? Want to learn more about how Bread & Butter solves the four biggest problems facing marketers today? Book a demo and see how Bread & Butter is helping marketers make the most of their first-party data
Add authentication & API event tracking to your website/app with a script tag & configuration

