How To Set Up Your Own Microsoft App (SAML)
Last updated 05/29/2026
Step 2
Under Azure services, click on Enterprise applications.
If you don't see it, click on "more services" and search for it.

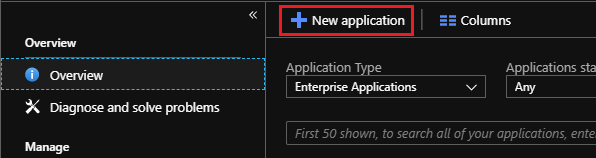
Step 3
Click New Application.
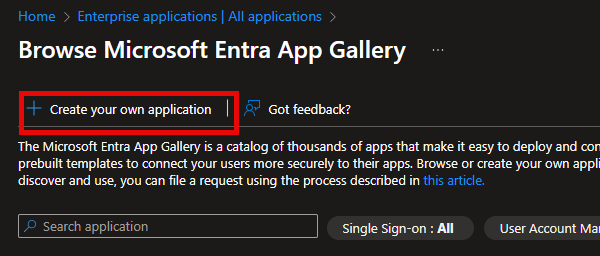
Step 4
- Click Create your own application.
- Enter a name for your application (we recommend using your organization name).
- Select Integrate any other application you don't find in the gallery (Non-gallery)
- Click Create.
Alternately, you can choose an existing SAML app from Microsoft.
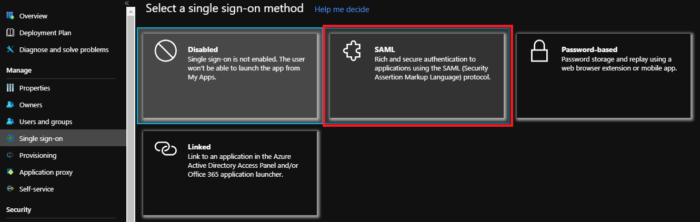
Step 5
Under Manage in the left menu, go to the Single sign-on page, and select SAML.
Step 6
On the Single sign-on page, click the edit button at the top right of the Basic SAML Configuration section.
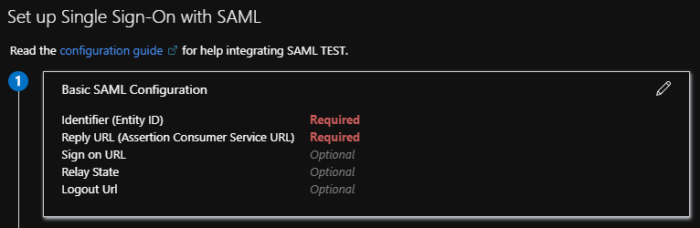
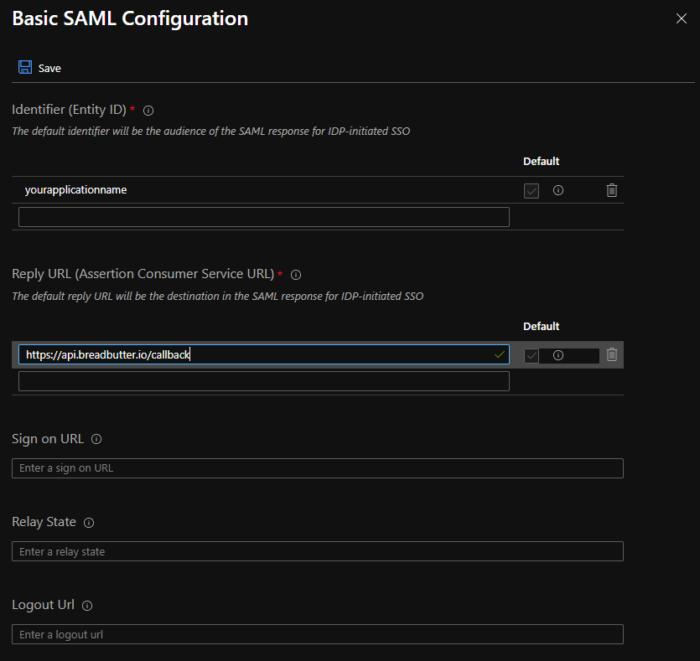
Step 7
- For Entity ID, enter anything you want. For example, you can enter your company name.
- For Reply URL, enter:
https://api.breadbutter.io/callback - If required, for the Sign on URL enter:
https://api.breadbutter.io/callback - Click Save.
Step 8
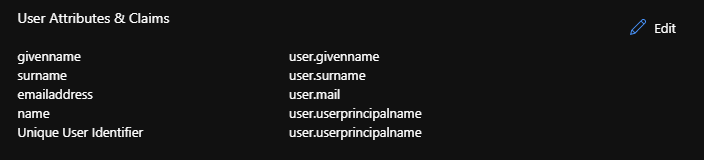
For the User Attributes & Claims section, ensure that at least the following are present:
- emailaddress
- givenname
- surname
Step 9
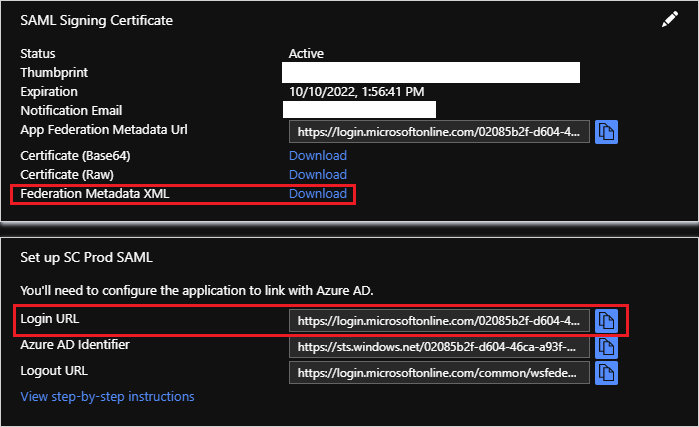
- Download the Federation Metadata XML for the Bread & Butter configuration below. Specifically, take note of the Login URL, Identifier (Entity ID) and X.509 Certificate.
- Set a reminder for yourself to generate a new Certificate before it expires. If the Certificate expires, your users will no longer be able to log in with the provider.
Step 10
Go to Users and groups in the left menu, and add the users and user groups you want to allow to authenticate with this app.
Step 11
Bread & Butter Setup:
- Go to https://app.breadbutter.io/sign-in/
- Click Sign In and authenticate (or Sign Up make a new account and authenticate)
- Go to Settings in the left menu.
- Click on the Microsoft button under Global Conversion Methods > Enterprise Connections.
- Choose SAML for the protocol.
- Enter a name.
- Enter a description (optional).
- Enter the Login URL from the setup page in Azure.
- In the Client ID field, enter the Identifier (Entity ID) that you set in step 7.
- In the X.509 Certificate field, enter the X.509 certificate from the Federation Metadata XML document that you downloaded above. Do not include the <X509Certificate> begin and end tags.
- Click Save.
- Enable Microsoft by clicking the new entry in the Microsoft connections list