WordPress Content Preview
Last updated 12/06/2023
Bread & Butter’s content preview feature allows you to limit access to specific web pages on your website to visitors that have authenticated. When the user goes to the page, the content is partially hidden by the content preview sign in section. It can be configured to appear immediately, after a period of time, or when a user scrolls past a certain percent of the page.

You can also customize the text content at the bottom to meet your unique business needs. Once signed in, users can see the page content.
To set up content preview, please follow the steps below.
Step 1
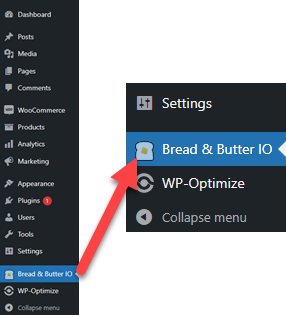
In the left menu in WordPress Admin, click on Bread & Butter.
Step 2
Click on the Content Gating tab, then go to the Content Preview Setup section.
Specify the Pages that you want to restrict to logged in users. You can choose one or many pages.

Step 3
Enter any custom text you wish to appear in the header or below the sign in options. If you do not specify custom content, the suggested content displayed in the fields will be used.
- The Header is the content that appears in the header above the sign in options.
- The Sub Header is the content that appears below the header.
- The Bottom Paragraph is the content that will display below the sign in options.
- The Expanded Bottom Paragraph is the content you want to display when the user clicks to expand. This lets you add more text for users who need more information.
- The expand label is the "more" or "expand" text, and can be anything you want. We recommend starting with "more >>" to see how it looks.

Step 4
Choose whether you want page links that are still visible above content preview to be clickable. For example, if you still want users to be able to click on links in your header on a page with content preview enabled.

Step 5
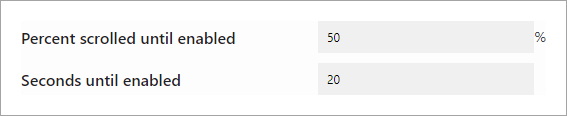
Set any time or scroll delays.
- For Percent scrolled until enabled, choose a value between 0 and 100. 0 will load immediately, 50 after half of the page is scrolled through, etc. Make sure to set the time value very high if you want content preview to be triggered primarily through the scrolling action of the user.
- For Seconds until enabled, choose the number of seconds after page load until content preview is displayed.
Step 6
Set the maximum height. This is the percentage of the screen that the Content Preview will take up. Set to 0 to have it set to the height it needs to fit all sign in options.

Step 7
Enable Override Registration Destination URL if you've set a Registration Destination URL in your app settings, but want that to not apply to Content Preview pages.
If you do not have a Registration Destination URL set in your app settings, you can ignore this setting.
Step 8
Click Save to save and apply your changes.
The specified pages are now gated for signed in users only.
Need custom settings per page?
All Content Preview settings can be configured at the page level, allowing you to have different text and behavior for specific pages. Just follow these quick steps:
- Open the page editor for the page or post.
- Click the Bread & Butter logo at the top right, or click on the Options button, and selecting Bread & Butter under Plugins.
- Expand the Content Preview section in the right panel.
- Click Enable, and then make your changes.

Don’t use Bread & Butter? Want to learn more about how Bread & Butter solves the four biggest problems facing marketers today? Book a demo and see how Bread & Butter is helping marketers make the most of their first-party data


Seeing changes in your match rates? With the end of third-party cookies & new regulations on how data can be shared (GDPR, CCPA or Data Protection Laws), what are you doing to make sure you aren’t caught out?
FUTURE PROOF YOUR DATA - LEARN MOREAdd authentication & API event tracking to your website/app with a script tag & configuration